LightCare
BEST PRACTICES

A collection of tips to help you get your new RX System set up and running.
These represent the most common questions asked but If you don't find the answer you need in this section, please click here to submit a support request.

The RX 1 will move through standard 32" doors.
The RX1 comes equipped with casters. It is easy to re-position within a treatment space and can be moved to a different room through any standard 32" door.
Prior to assembly, It a good idea to check measurements of any doors the RX must pass through to ensure access. Otherwise the RX must be assembled in the room where it will be used.
Two Hands Good. Four Hands Better. Especially For Placing The RX 1 Head Unit.
Most of the RX assembly can easily be accomplished by one person. Lifting the RX Head Unit into place atop the posts however is a step best handled by two people.
The Head Unit weights approximately 32 lbs. Positioning the head Unit is not difficult, must must be accurate. Two people make this task easier and safer.

It is best to unload contents in a roomy area close to where you will be using the Rx
As you unbox the RX 1 shipping crate you will want to separate component parts and ensure that you have everything you need to assemble your new system.
A roomy area where you can spread out is a must. Proximity to the area where you will be using the RX 1 is convenient.
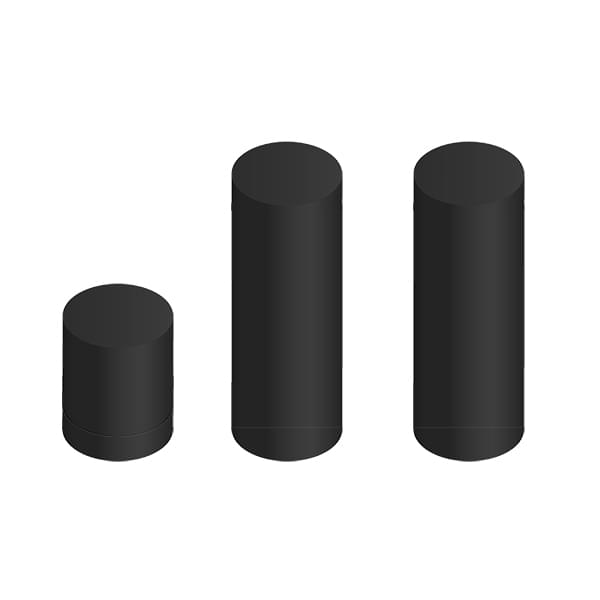
Use one, two or three posts in any combination based on the height of your table.
We suggest starting by attaching one of the larger posts to the base unit then using a combination of additional post(s) to bring the height of the RX 1 to the appropriate height for your table. You may have to make fine tuning adjustments to your table to find the optimal positioning.
If you have a table with powered and variable height settings: set your table at a convenient hight, then use an appropriate combination of posts to match the height of your table. Finally, fine tune your table height as required.
A moment spent confirming that the RX system is properly powered can save time, frustration and red faces.
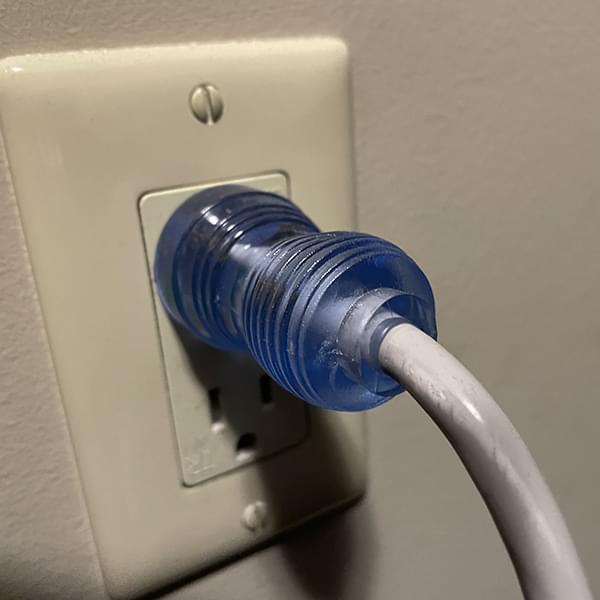
Although it sounds simple, taking a moment to ensure that the power cord is firmly seated in its port on the back of the RX unit is the right first step if your RX system does not turn on (start at the beginning as they say).
Next, make sure that the power cord is also firmly attached to the wall receptacle and that the receptacle is in fact delivering power (plugging a lamp or similar small electrical device will confirm operation).
RX systems can share a circuit as long as that circuit has a light electrical load (a lamp or overhead light, a small appliance and so on). Your RX cannot share a circuit with larger appliances with heavier power needs (refrigerators or air conditioners for example).
RX systems do not themselves require unusually high levels of power and so can operate while sharing a circuit –– with an existing light overall electrical load.
Your RX system should not share a circuit with major appliances such as refrigerators or air conditioners –– which both have heavier draws and continuously cycle on and off.
Hospital grade receptacles incorporate additional construction features and are subjected to higher performance requirements. As well, they are resistant to accidental disconnections.
Hospital Grade receptacles are simply made to higher manufacturing standards than household receptacles and are less prone to accidental disconnections.
Not essential, but never-the-less a wise component in a first class installation.
An uninterruptible power supply provides important protection and is essential to maintaining your warranty.
Protecting valuable assets is never a bad idea.
Protect your RX investment with a good quality Uninterruptible Power Supply (UPS) –– the exact same units frequently used to protect computer and home entertainment systems. (available at Staples, Amazon and similar outlets.
These inexpensive units protect against power surges and sags (brown-outs) that can damage attached equipment and have built-in batteries so power to connected devices is maintained during a brief power outage.

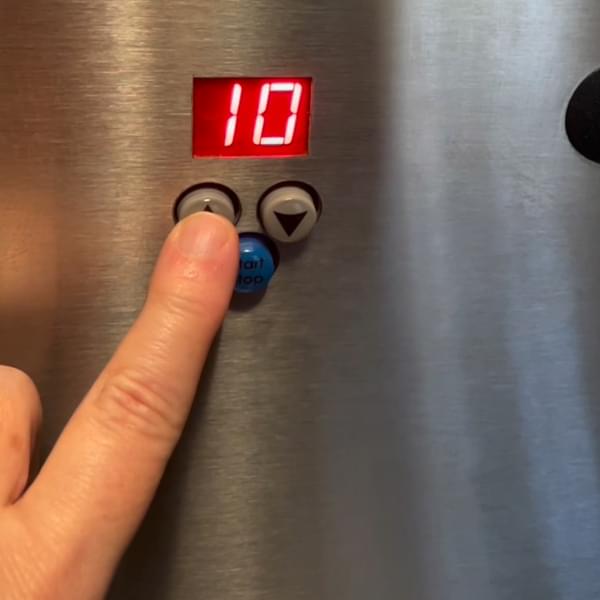
Pressing The Grey Arrow Buttons Will Set The Treatment Session Timer
Recommended treatments are 10-20 minutes but the session timer can be set for any time up to 20 minutes (maximum recommended per day).
The grey button with the UP arrow starts at 1 and goes UP with each press.
The DOWN arrow starts at 20 and goes DOWN with each subsequent press.
The treatment session will end automatically when the timer expires. The timer will automatically re-set to zero after each treatment session.
There Is An Adjustable Pause Between Pressing The Start Button and The RX 1 Activating To Begin Treatment. Delay time adjustable between 1 and 3 minutes
TO CHANGE DELAY TIME
Step 1 | Press and hold the START-STOP button and the UP arrow button at the same time until the display panel changes to a flashing 'P' (you are now in set up mode)
Step 2 | Once you have the flashing 'P' release the buttons
Step 3 | The readout will now display .1
Step 4 | Press the UP button twice –– the display will read .3
Step 5 | Press the START-STOP button to display the current delay time setting (flashing number between 1-3)
Step 6 | Use the UP or DOWN arrow buttons to adjust this number as you like
Step 7 | Then press and briefly hold the START-STOP button to record your selection
Step 8 | Finally, press and briefly hold the UP and DOWN buttons together to exit set up and return to operating mode

After a treatment session the RX 1 Light will turn off automatically but the cooling system will continue for about 4 minutes.
Allow the 'Cooling' cycle to complete before shutting down the system.
The cooling fans can be heard during this period. The Rx1 will then go silent when the system is ready for the next patient or to be shut down.
LIGHT ELECTRICAL LOADS | GENERALLY OK
Lamps & Overhead lights • A Small Appliance • A Music Source
HEAVY ELECTRICAL LOADS | TO BE AVOIDED
Dishwashers * Microwaves * Refrigerators • Air Conditioners • Toasters/Toaster Ovens
When in doubt, consult an Electrician
Hospital grade receptacles incorporate additional construction features and are subjected to higher performance requirements. As well, they are resistant to accidental disconnections.
Always a good idea
A collection of tips to help you get your new RX System set up and running.
Assembly Is Quite Basic
When assembled the RX 1 requires a minimum opening of 32". This is the standard width of interior doors for most homes and buildings.

Double Check To Make Sure
Three Post Sections are supplied. Use the appropriate post sections for the height of your treatment table.
Some Fine Tuning of Table May Be Required
Press the BLUE STOP / START button on the front panel of the RX 1 Head Unit

Stop A Treatment Session
The RX system needs to cool down between patients or before being shut down. After a treatment session the RX 1 Light will turn off but the cooling cycle will continue for about 4 minutes.
Wait For The Cooling Cycle To End
Confirm Power Cord Is:
► Firmly attached to the RX Head Unit
► Firmly attached to the Power Receptacle
Confirm Electrical Receptacle is:
► Receiving Power

Check The Power First
Uninterruptible Power Supplies are available at leading computer and electronics stores.
Increased Peace of Mind
It is best to unload contents in a roomy area close to where you will be using the Rx.
Easier To Keep Things In Sight
The RX 1 Head Unit weights approximately 32 lbs. and must be positioned accurately on the topmost post. A second set of hands makes this easier and safer.
Extra Hands Make Light Work
The UP arrow starts at 1 and goes UP with each press. The DOWN arrow starts at 20 and goes DOWN with each subsequent press.
When Time Expires –– Session Will End
Delay Time: Lapse Between Pressing Start Button and When The RX 1 Light Is Activated And Treatment Begins.
Delay Time Can Be Adjusted
Learning to operate the RX 1 PBM system is very simple –– it typically takes less than 2 minutes.
• Power On The RX system
• Set The Treatment Timer
• Position the Patient
• Press 'Start'
• Leave The Room
Get Up-To-Speed Quickly